How to Reduce Background Noise on Blue Yeti (2025)
Published · Updated
- Music
- Technology
How to Reduce Background Noise on Blue Yeti: The Ultimate Guide for Crystal Clear Audio
Whether you’re working in the studio on your first big hit or creating podcast content, I know how important it is to capture pristine audio quality.
There's nothing worse than after your perfect take you realize the microphone captured a lot of background noise, and the take is unusable. Yes, there are plugins and specific software applications available to clean up the recordings, especially AI based tools. But getting a clean recording in the first place is the best way to get the highest quality, natural sound.
In this blog post, I’ll share tips and tricks to reduce unwanted background noise on your Blue Yeti microphone so you can get pristine, professional-quality results with your microphone.
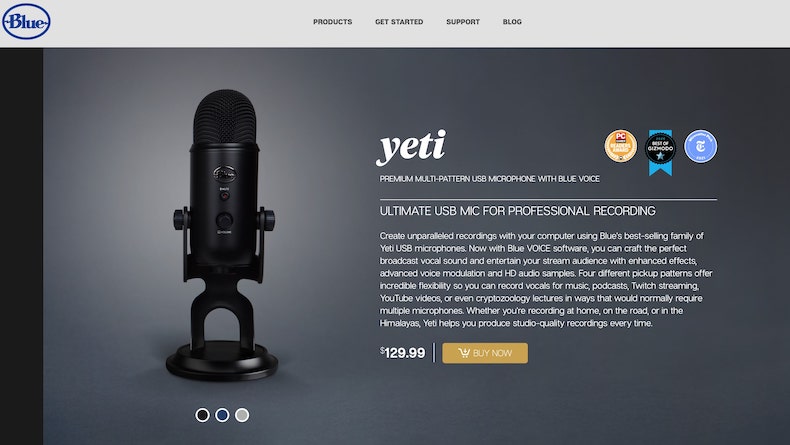
The Blue Yeti has become a popular choice among content creators and for a good reason. Its different settings and ease of use make it a good option for capturing high-quality audio recordings.
Even the best microphones can’t completely eliminate background noise alone. Don’t worry, though. I’ve got your back!
We'll check out ways to get the most out of your Blue Yeti for crystal-clear recordings every time.
How to Reduce Background Noise on Blue Yeti: Setting the Stage
Before we get into the nitty-gritty of eliminating background sounds, it’s essential to understand the impact of ambient noise on your audio recordings.
Dealing with ambient sounds is crucial when recording with a microphone, especially when using any USB condenser microphones by Blue Microphones.
The best way to enhance the sound of your voice starts by minimizing ambient noise. Creating a quiet environment before hitting the record button is not only a good idea, but it's vital to avoid any sound issues that can't be fixed in the mix.
Create a Quiet Recording Environment
Creating a quiet recording environment minimizes ambient sounds and unwanted background noise. Look for a room with minimal echo, as large rooms with hard surfaces can produce unwanted reverberation. You can also use soft furnishings like curtains, carpets, or acoustic panels to absorb sound waves and reduce noise.
Another essential tip is to turn off noisy electronic devices, such as air conditioners, fans, or fridges, while recording. If you’re using a computer with loud fans, consider placing it farther away from your Blue Yeti microphone or using a longer USB cord for your connection.
Enhance Your Recordings with a Microphone Isolation Shield
A microphone isolation shield is another effective method to improve your Blue Yeti’s sound quality and minimize unwanted background noise.
These portable devices are designed to surround your microphone, blocking out ambient noise and reflecting sound waves away from your recording area. They create a more focused and controlled environment for capturing clear audio, especially in rooms with less-than-ideal acoustics.
I use an isolation shield in my studio and it's really great for ensuring that the mic doesn't capture any ambient sound in the room. It works great on both vocals and any acoustic instruments.
Microphone isolation shields come in various sizes and materials, so it’s essential to find one compatible with your Blue Yeti setup. Consider the shield’s compact design and ensure it can be easily mounted on your boom arm or microphone stand.
By investing in an isolation shield, you’re enhancing your audio recordings and stepping towards a more professional microphone setup without needing expensive equipment or dedicated recording spaces.
Budget-Friendly Acoustic Solutions: Utilizing Closets and Duvets for Improved Audio
If you don’t have a dedicated home recording studio or expensive acoustic treatment, don’t worry. There are budget-friendly alternatives that can help you create an acoustically suitable space for recording with your Blue Yeti microphone.
One great option is utilizing a closet or wardrobe. The clothes inside can help absorb sound waves, reducing echo and background noise and providing a more controlled recording environment.
Another affordable solution is hanging a thick duvet or blanket behind and/or around you while recording. This makeshift acoustic barrier can effectively absorb sound waves and minimize unwanted noises, creating a more focused and intimate recording space.
Ensure the duvet covers a wide area, extending from the floor to above your head, and as wide as possible to create the most effective sound barrier.
These budget-conscious options won't look flashy like a million-dollar studio, but they'll get the job done! They can substantially enhance your audio quality without breaking the bank.
Find the Perfect Gain Setting and Mode
One of the most critical aspects of achieving clear audio with your Blue Yeti microphone is finding the right setting for the gain knob. The microphone gain setting determines your microphone’s sensitivity, affecting your recordings’ volume level.
To minimize unwanted background noise, start by adjusting the gain knob to its absolute minimum and gradually increase it until you find the sweet spot where your voice is clear and background noises are minimal.
In addition to adjusting the gain, selecting the best polar pattern is crucial. The Blue Yeti offers four pickup patterns: cardioid, bidirectional, omnidirectional, and stereo.
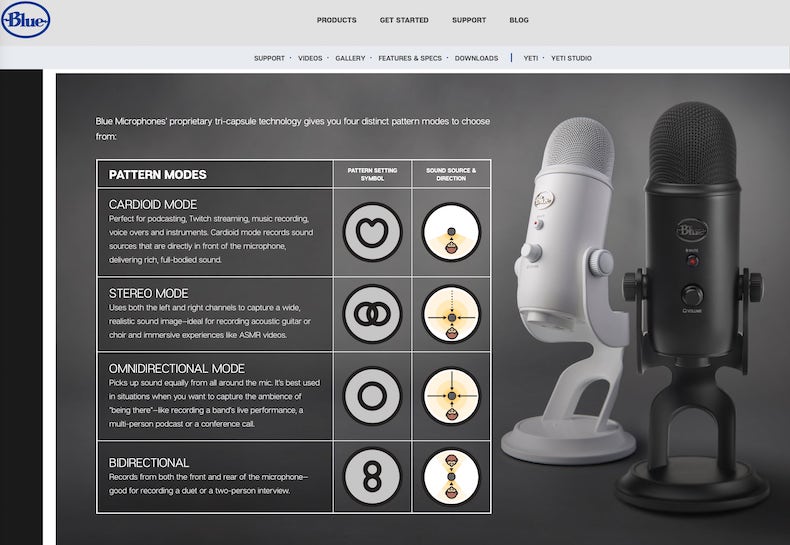
The cardioid mode is the most popular choice for voice recording and live streaming. It captures sound waves coming directly from the front of the mic while reducing noise from other directions. This pattern is helpful for single sound sources like podcasts, voiceovers, and music recordings.
Accessorize for Noise Reduction: Pop Filter, Shock Mount, and Boom Arm
Pop Filter
Shock Mount
Boom Arm
Mastering the Art of Microphone Distance for Flawless Recordings
When capturing high-quality audio with your Blue Yeti microphone, the distance between you and the mic plays a critical role. Striking the perfect balance can significantly reduce background noise and capture your voice with clarity and precision.
Too far away, and you’ll need more background noise and a weak audio signal.
Too close, and you may experience audio issues like distortion, crackling sounds, or overwhelming bass response.
Generally, maintain a distance of 6 to 12 inches (15 to 30 centimeters) between your mouth and the microphone. This range is often considered the sweet spot for most vocal recordings, whether you’re podcasting, live streaming, or recording voiceovers.
Feel free to experiment within this range to find the ideal position that captures the essence of your voice while minimizing unwanted noises.
The correct distance can vary depending on your voice, recording environment, and Blue Yeti settings. Take your time to test and adjust as needed.
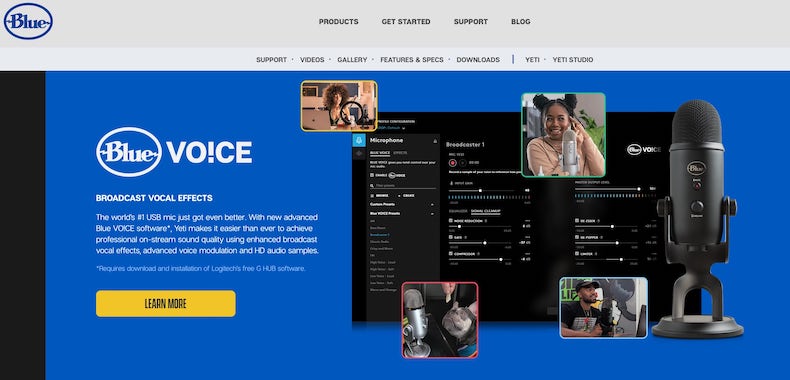
Utilize Noise Reduction Software and Noise Gate Plugins
Even with the best Blue Yeti settings, sometimes you’ll still have some background noise in your audio recordings.
In these cases, noise reduction software and noise gate plugins can be viable options. However, remember that these tools should be your last resort for the noise; implement every step outlined in this article to capture the cleanest possible audio quality.
Noise reduction software and noise gate plugins can help clean up your audio signal in real-time or during post-production, eliminating unwanted noises while preserving the sound of your voice.
Various free and paid options are available, so take your time exploring and finding the one that works best for your needs.
Remember that noise reduction software will affect your overall audio quality too. High frequencies are typically affected, so be careful with adjustments and experiment with settings until you find a spot where the quality of your recordings is preserved, and the noise minimized.
These tools can significantly improve the final audio quality, transforming your Blue Yeti USB microphone into a professional sound recording device.
Frequently Asked Questions
What is the best voice recording polar pattern setting on the Blue Yeti?
Can I use the Blue Yeti for music recording?
How do I connect my Blue Yeti microphone to my computer?
Do I need additional software to use the Blue Yeti microphone?
Can I monitor my audio in real time with the Blue Yeti microphone?
What is the difference between Blue Yeti and Snowball microphones?
Can the Blue Yeti microphone be used for live streaming?
How can I prevent static noise or crackling sounds using the Blue Yeti microphone?
Can I use AutoTune with a Blue Yeti microphone?
Is the Blue Yeti microphone compatible with gaming headsets like the HyperX QuadCast?
Conclusion
The Blue Yeti microphone is an outstanding choice for content creators seeking high-quality audio recordings without breaking the bank. With its versatile features and ease of use, it’s no wonder this microphone has become an industry standard.
Following the tips outlined in this blog post, you have all the resources to get your Blue Yeti microphone dialed in and sound noise-free!